Tip Sheet - Installing Handrail Bracket - Quasar Series
Explore our range of modern railing systems including cable railing systems, glass railing systems, and stainless steel railings — perfect for indoor and outdoor applications.
Overview
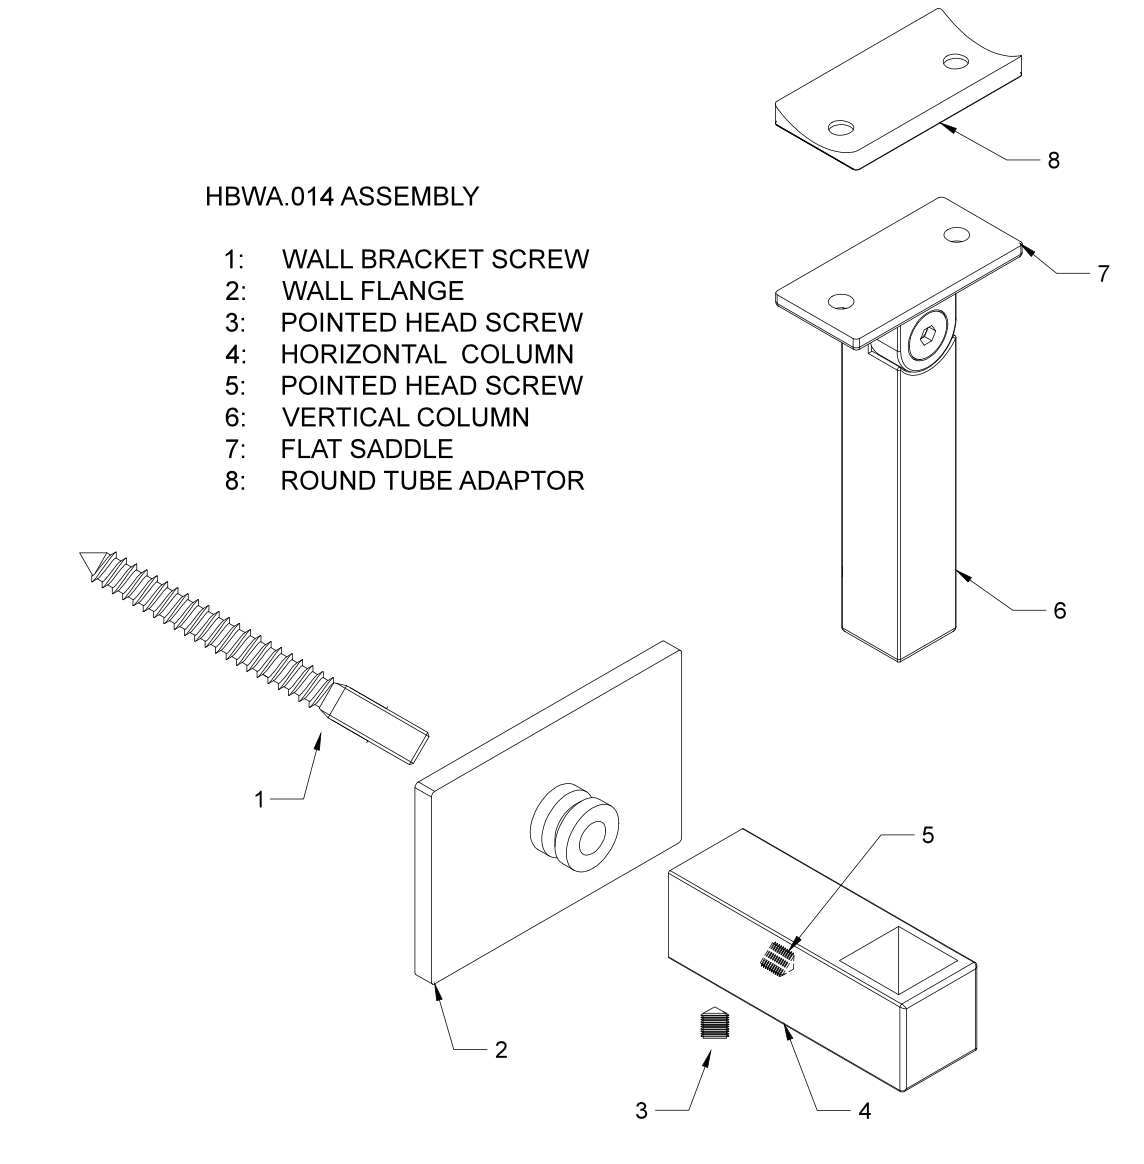
These instructions will provide step-by-step installation guidelines for installing the heavy-duty Premium-grade stainless steel Handrail Wall Bracket Magnetar, HBWA.014, into sheetrock, wood, or drywall surfaces
This bracket comes with a round saddle adapter to attach to round tubing, a wall bracket screw, a countersunk bolt to attach the flat saddle, and 2x M5 screws to attach to a handrail
Brackets should be installed with a maximum distance of 4’
Caution:
Wear protective AISI approved safety glasses, working gloves and breathing mask at all times
Tools Required:
Overview
Below are instructions for installing the Quasar line of Inline Design Premium-grade stainless steel Wall Bracket into drywall or sheetrock: these are SKU numbers HBWA.011, HBWA.012, and HBWA.013
These brackets come with a hanger bolt and 2x M5 screws to attach a handrail
Brackets should be installed with a maximum distance of 4’
Caution: Wear protective AISI approved safety glasses, working gloves and breathing mask all the time
Instructions
- Unbox wall bracket and begin with only the wall flange (#2) and wall bracket screw (#1).
- Thread the fine M8 side into the flat side of the screw until finger tight.
- Using a stud-finder, locate a stud and the vertical measurement off the nose of the step at which you will get your desired rail height (depending on stair angle this hole is typically 30” off the nose of step) drill using 3/16” drill bit.
- Drive the assembled screw and flange into the hole and secure it using a 5mm hex wrench [be careful not to over tighten.
- Back out the set screw 1-2 threads on the underside of the main assembly with a 2.5mm wrench and slide it right on to the wall mounted flange
- Position the bracket to the desired angle orientation and tighten the hex screw with the 2.5mm wrench
- Refer to these instructions to install Inline Design square or round tubing and additional hardware
Note: If using a round handrail, position the round saddle adapter on top of the flat saddle before attaching handrails
NOTE: A small amount of surface corrosion is not uncommon after some exposure to weather or salty conditions; we recommend using ourpassivation solutionor a Premium-grade stainless steel polish to prevent surface corrosion; more information availableon our Engineering Specs Page